I was asked by quite a few people how I made this picture lately. Well, I don't really think I'm using any fancy techniques here, but I made this more in-depth description of the process...
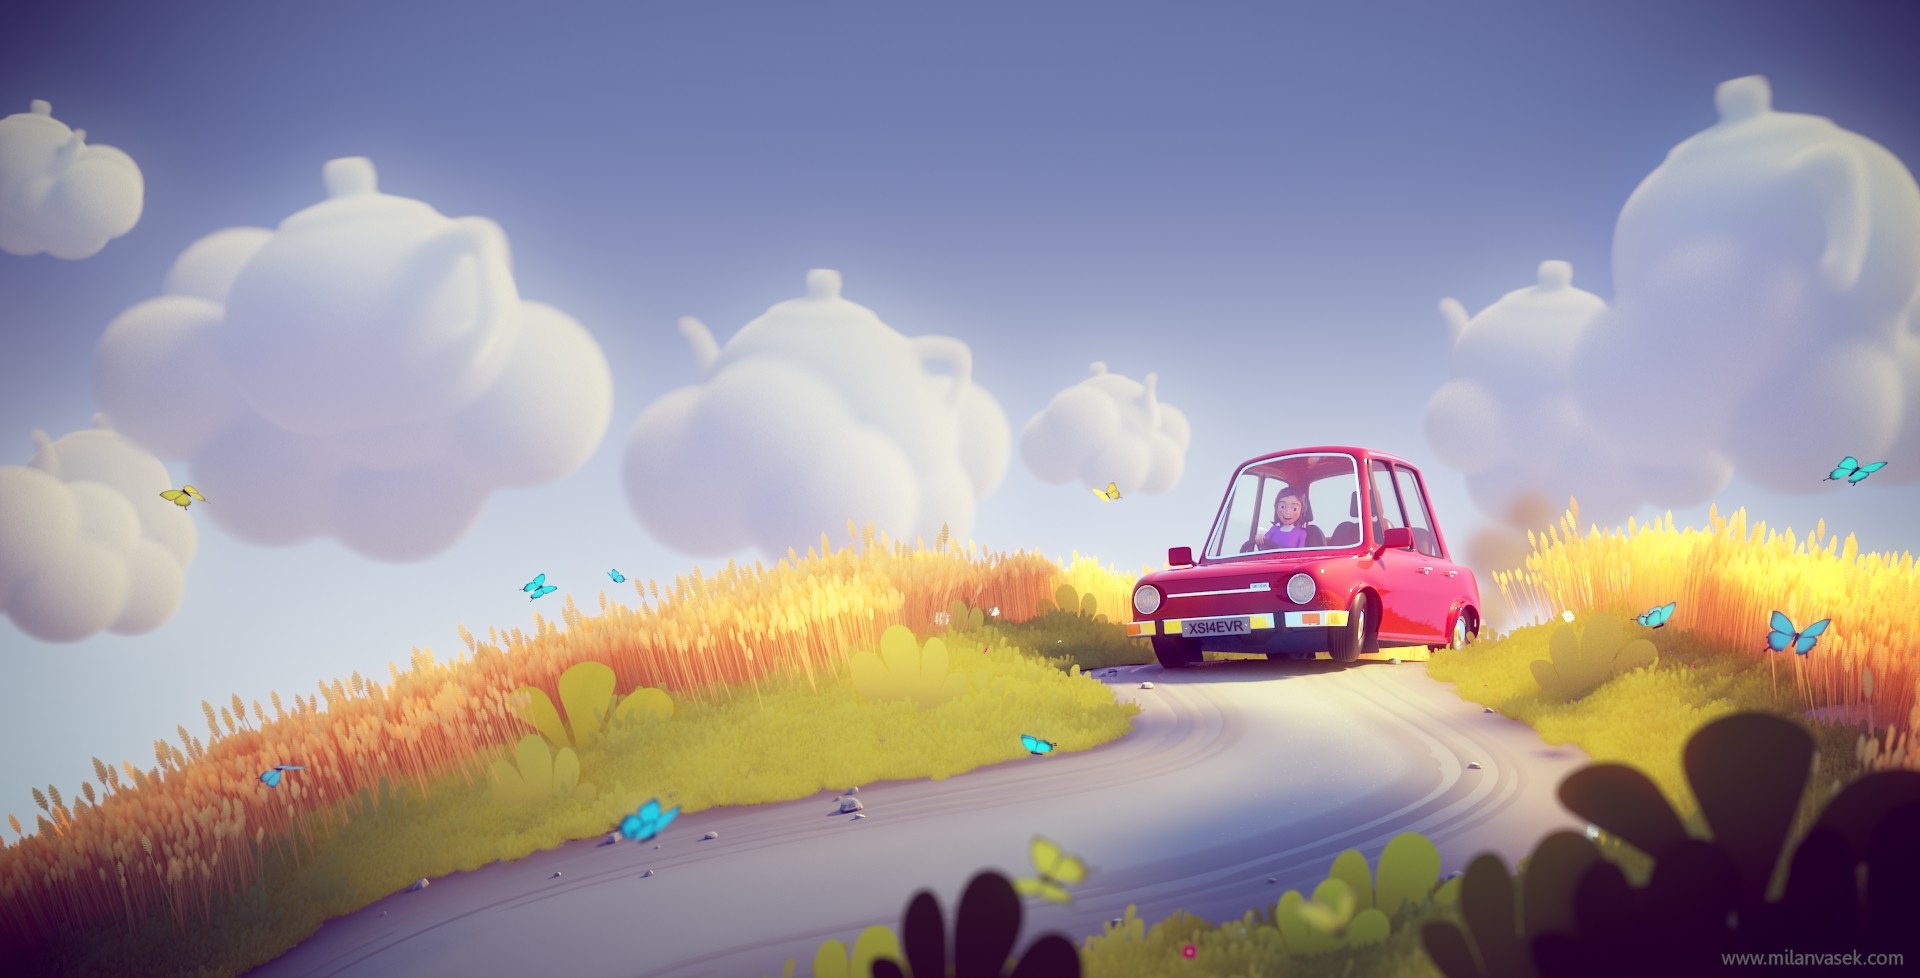
At the beginning, there is usually a simple idea/goal followed by a rough sketch... My goal here was actually style/look development. I wanted to create a 3d picture with a slightly different, more cartoon and soft feel. For that, I wanted really simple scene, something I won't be spending months with.
I use Clip Studio Paint on my Surface Pro tablet. It's an amazing combination, especially because CSP allows you to define pressure curve of each tool separately, which is way better than what default windows drivers allow you to do with that Surface pen :)

Car and character...
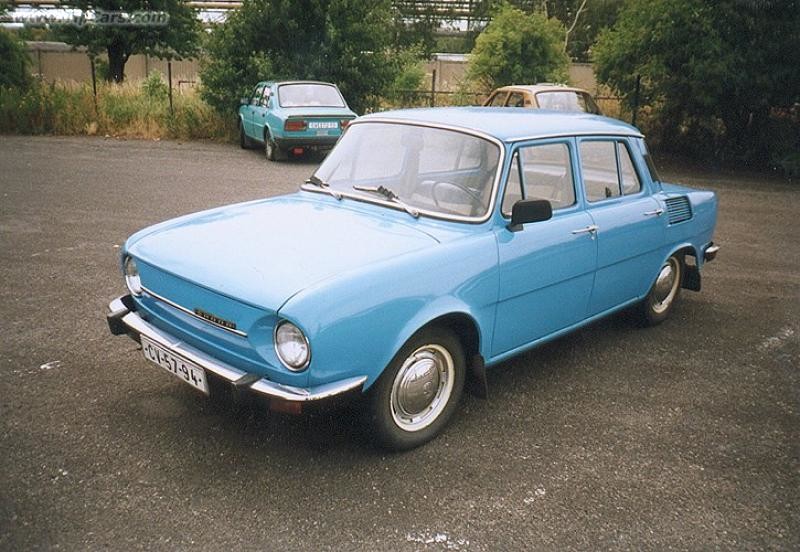
I picked "Skoda 100" car, a very popular model produced in our country in 70s. My intention was to create stylized version, not a perfect model and so I used this reference picture mostly to get the lights right and few other minor details ... There isn't much I can say about modeling a car. Create a box, cut edges, move points... (well, I'm not really a good modeler, so I'm usually trying to speed up this part, skip what is not necessary etc.)
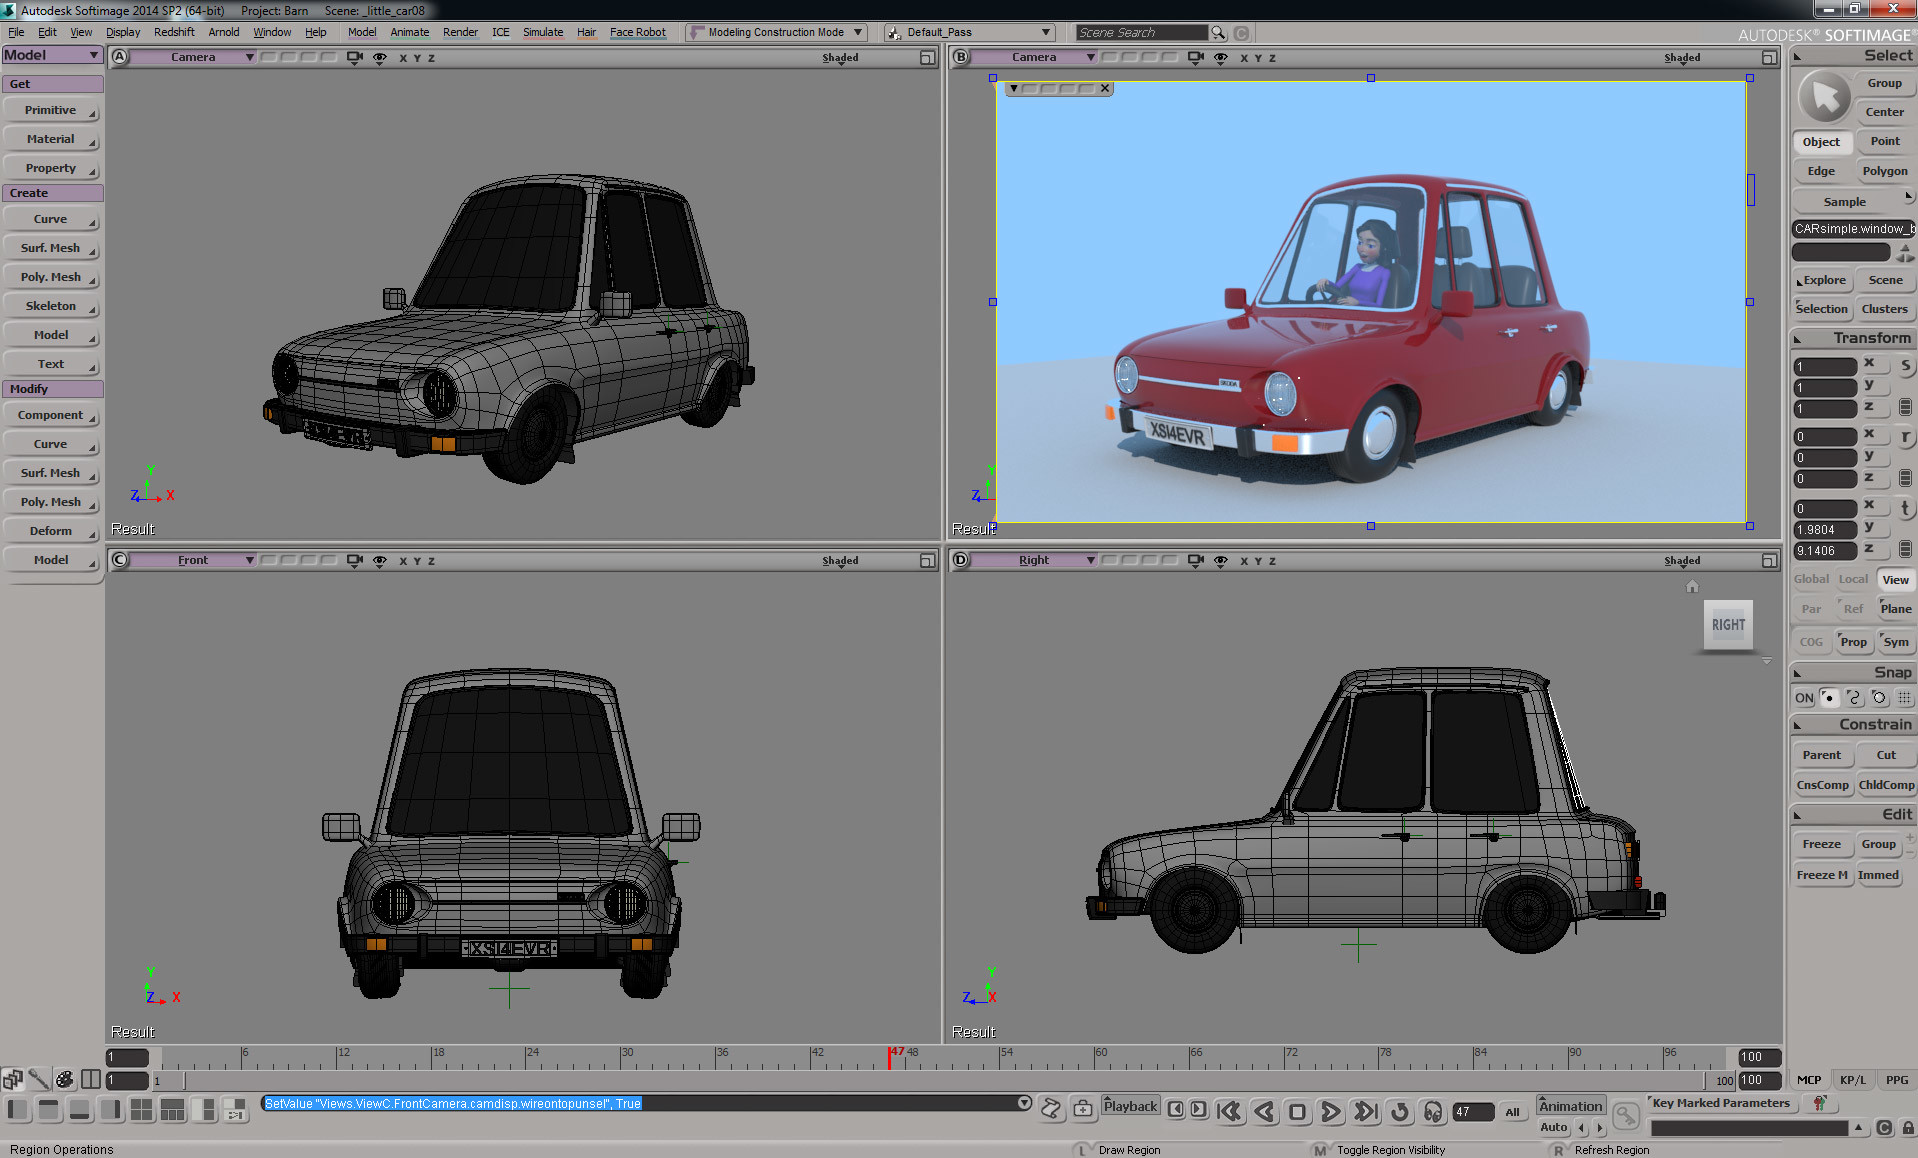
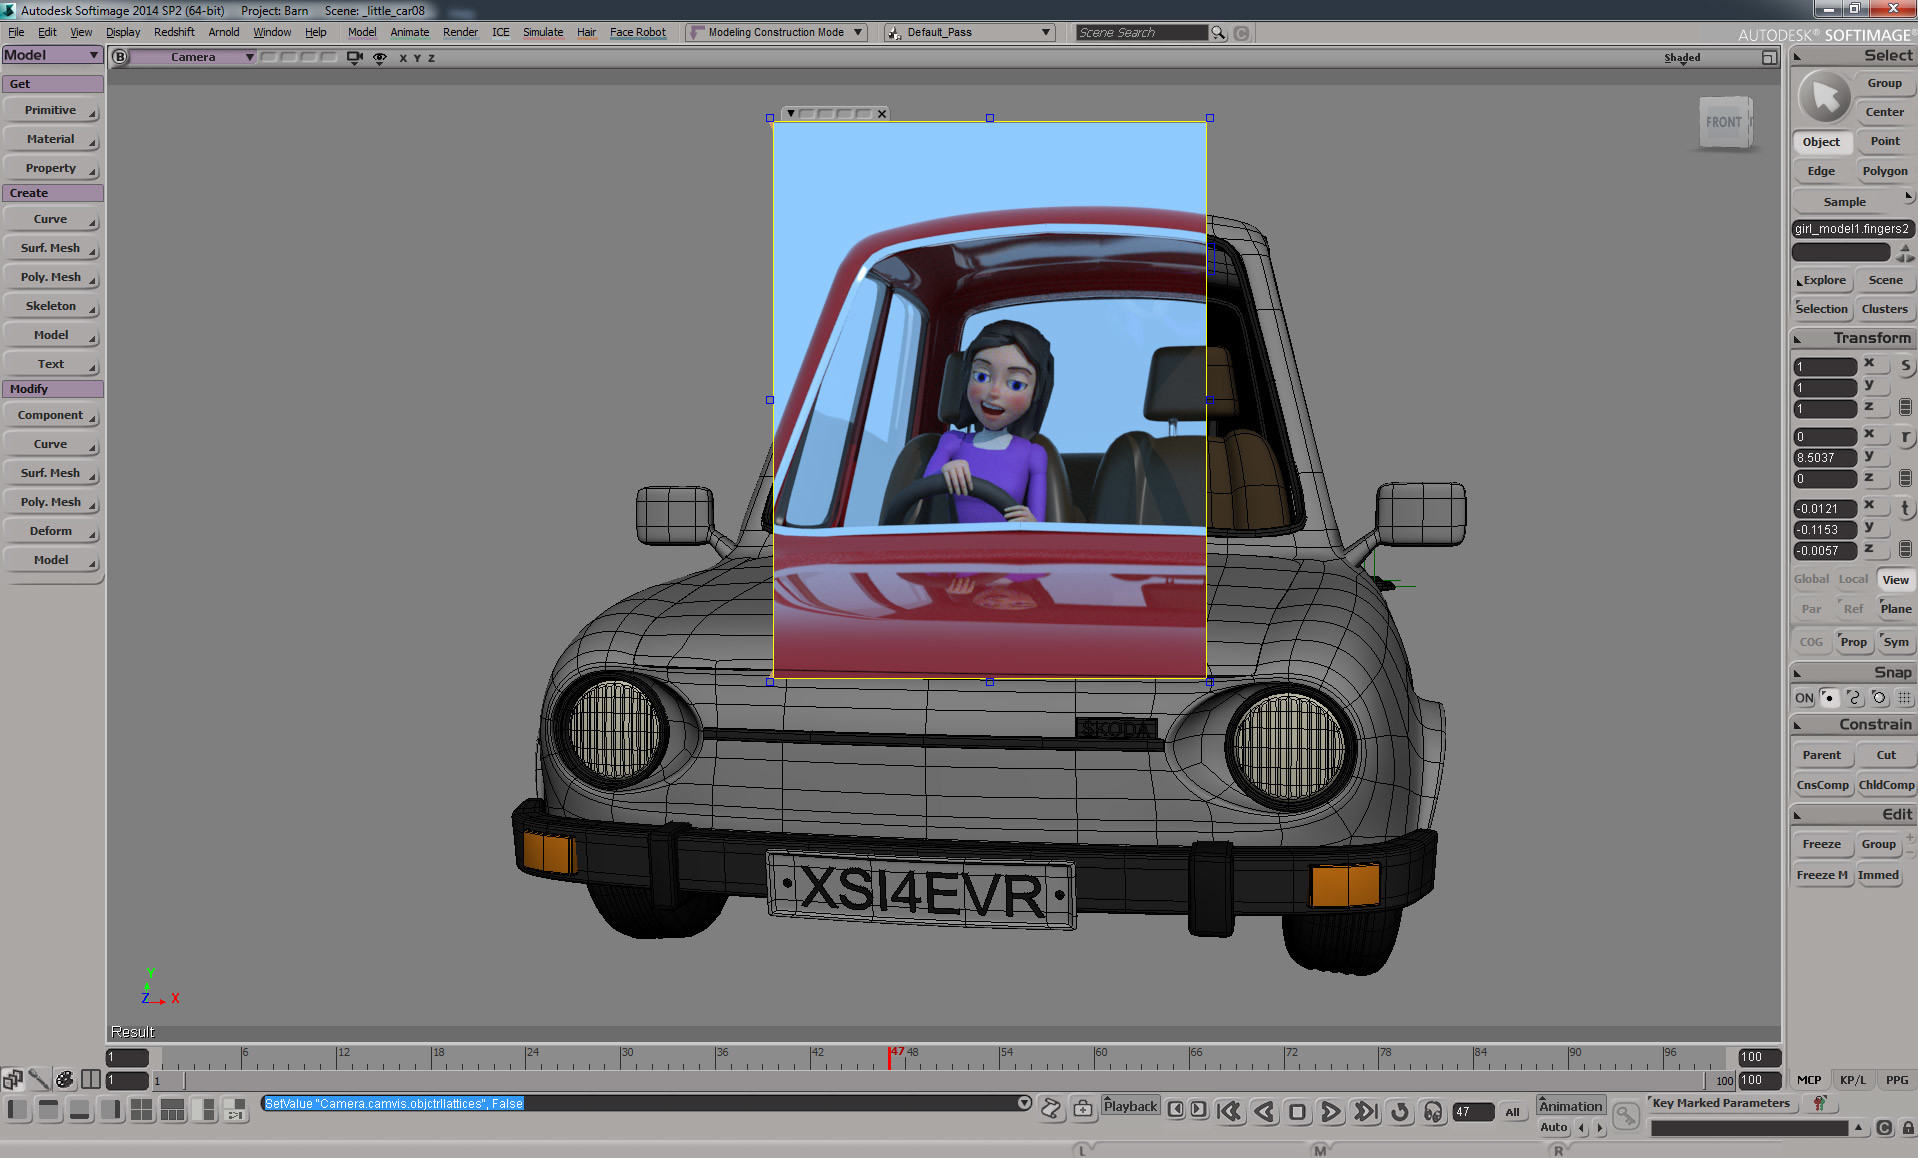
Character is also very simple. I didn't even connected her body, arm, fingers etc. into one model, because it would require at least basic rigging... instead I simply kept everything as separate meshes and rotated them into the pose. It was good enough when seen from that distance and hidden behind the glass...
Ground and road model
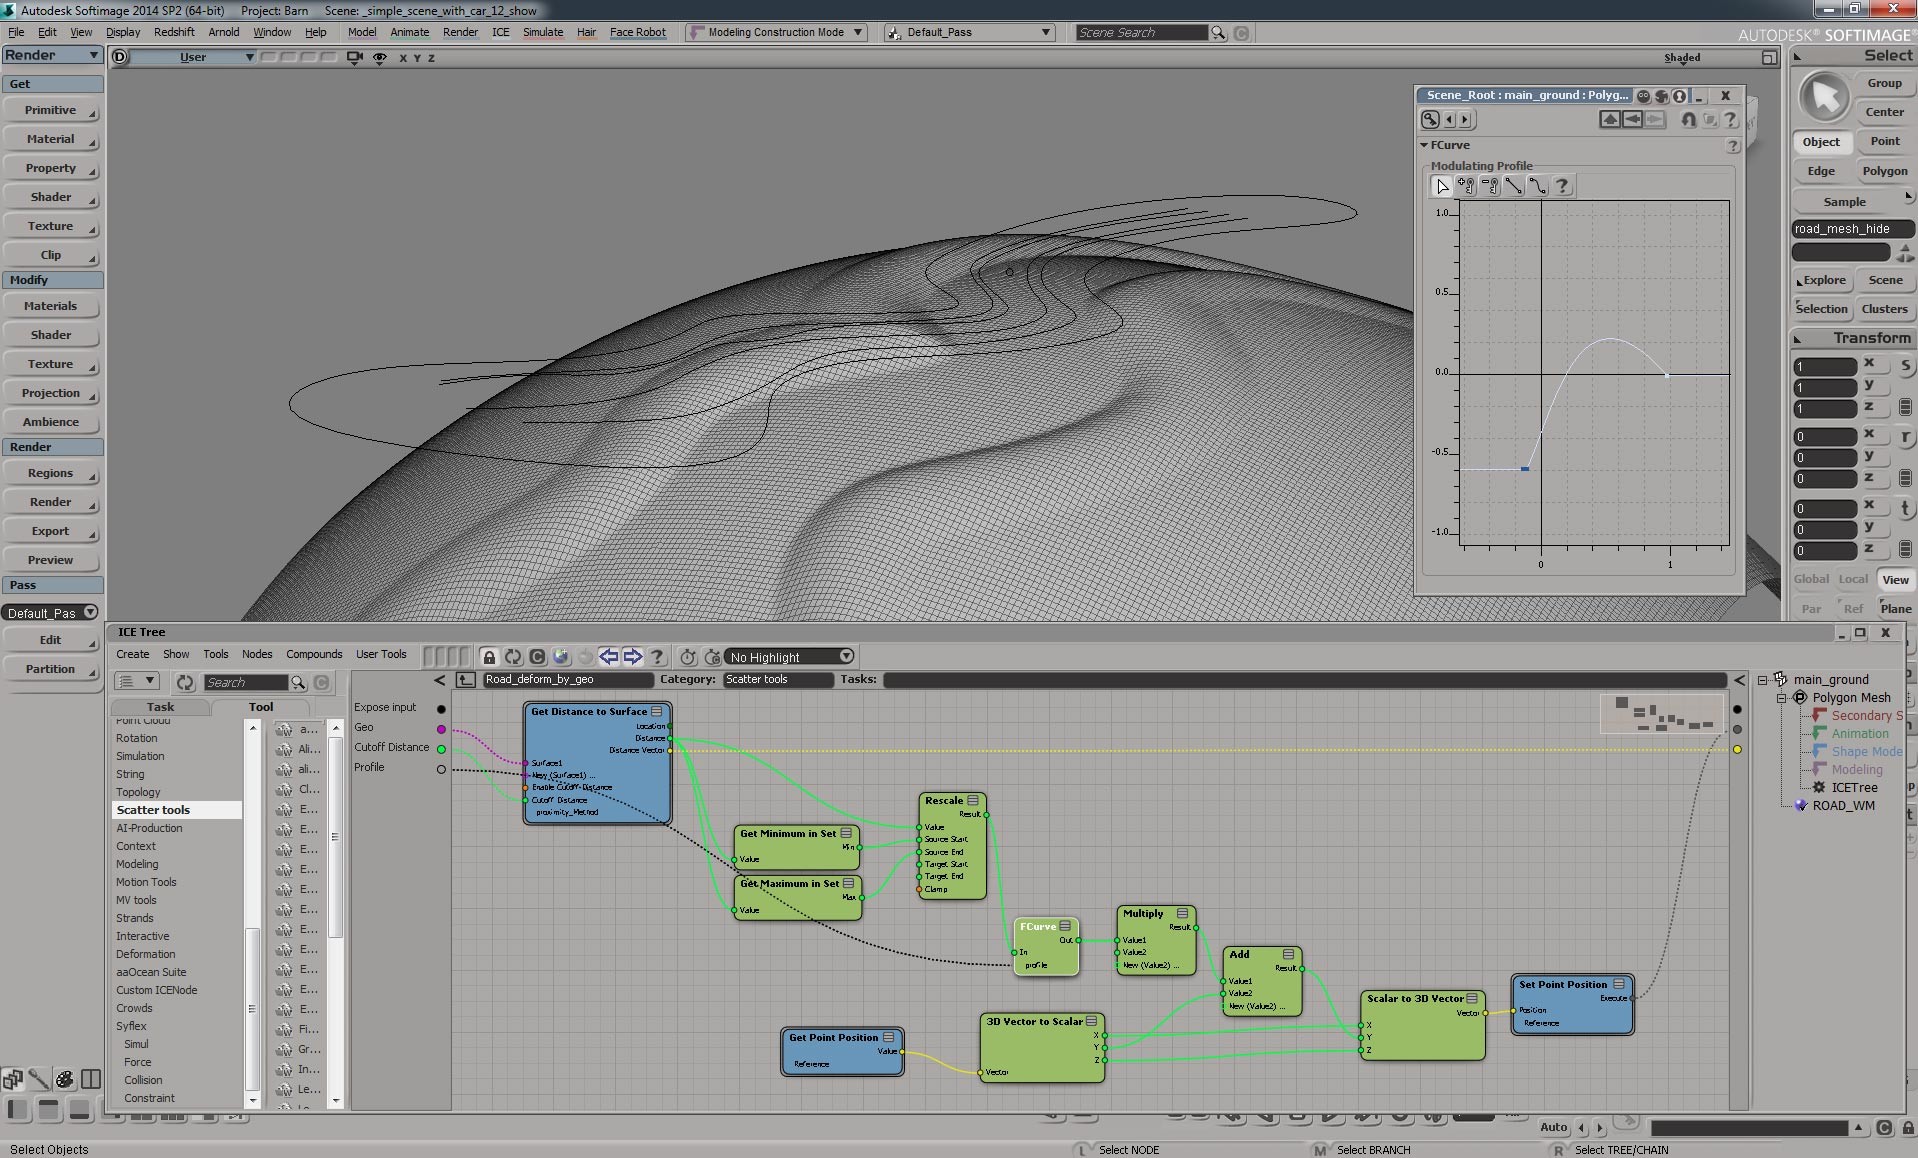
This is getting a bit more interesting. I wanted to keep things "live" to be able to change the shape of the road, slope of the hill and things like that easily anytime. So I used combination of standard Softimage operators and ICE (visual programming thing).
I knew the ground will have spherical shape, but to get nicer topology, I projected a grid on top of a sphere. I also drew a simple curve in a top view in a shape of the road.
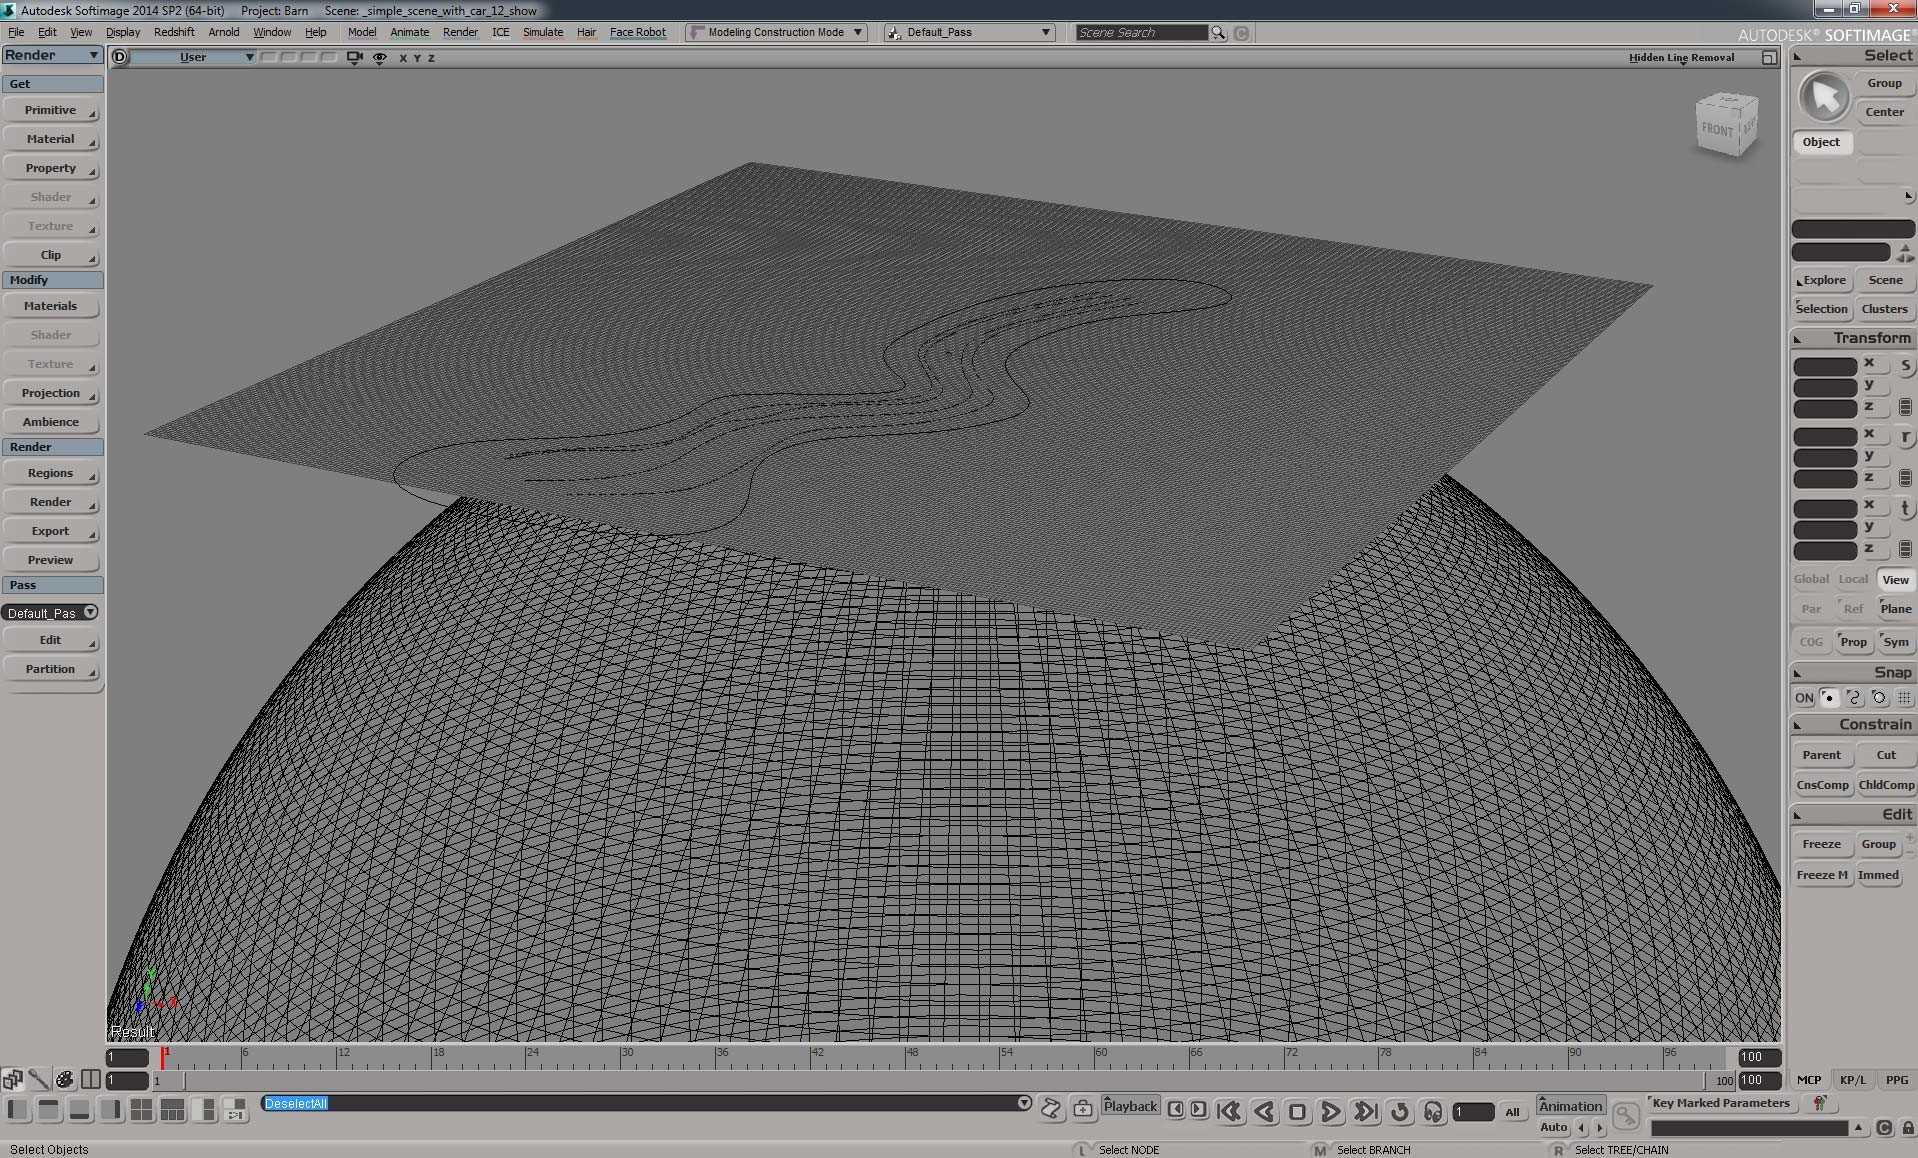
Then converted the curve to a mesh (because it's easier to work with polygon meshes later) and projected it to the same sphere as the grid before... Don't worry, that ugly mesh won't be rendered, it's there only for calculation of deformations...


And then used simple ICE tree to deform the grid based on a distance to the road mesh (it's already hidden in this picture). As you can see, I can easily control a profile of that deformation, it's intensity etc. It would be easy to add some irregularity as well, but my goal here was to make it look quite smooth...
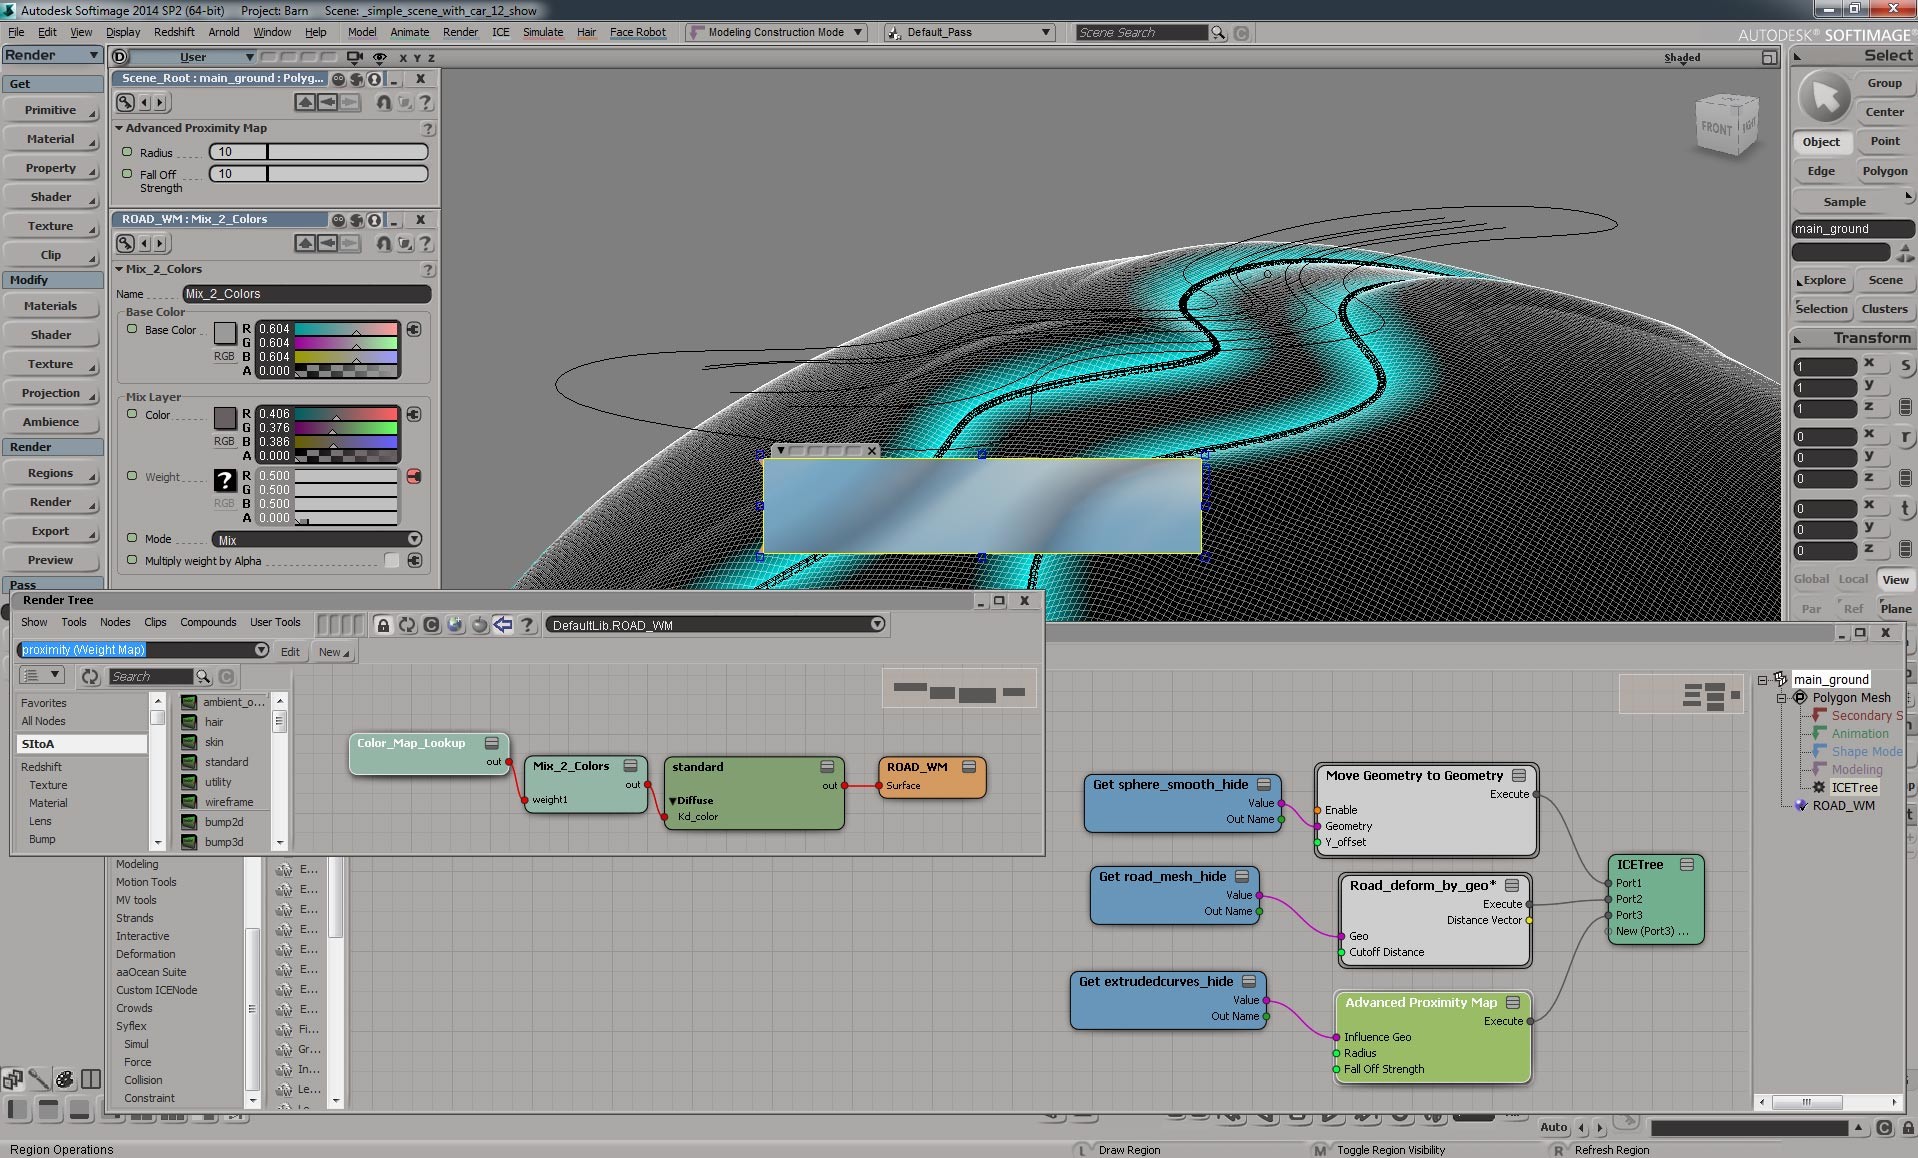
The last thing was to create a weight map that is used in a ground/road material (that Color_Map_Lookup node is reading the values of that weight map and using them to mix 2 colors...), to add a little gradient on the sides. I'm not using any textures unless I really have to, I don't like wasting time with UVs etc. So this is really a nice and simple way do add a little something extra...
Even at this point, I could just change the road curve, or change the radius of the original sphere and everything would get nicely updated...
Vegetation
This is all vegetation used in this project. As you can see, nothing complex.

ICE is amazing for scattering things around. I'm using instances on particles generated randomly on a surface of a geometry with that Scatter Simple node. Then modifying their attributes like size, shape, orientation. In this case, there are thousands instances of grass, few of them randomly scaled up, they are deleted if they are inside of that road curve (projected from above), their size is modified by some noises and also modified by a weight map painted on different mesh etc. They are actually generated on different mesh for some reason and moved to the final render mesh at the end.... I love ICE :)
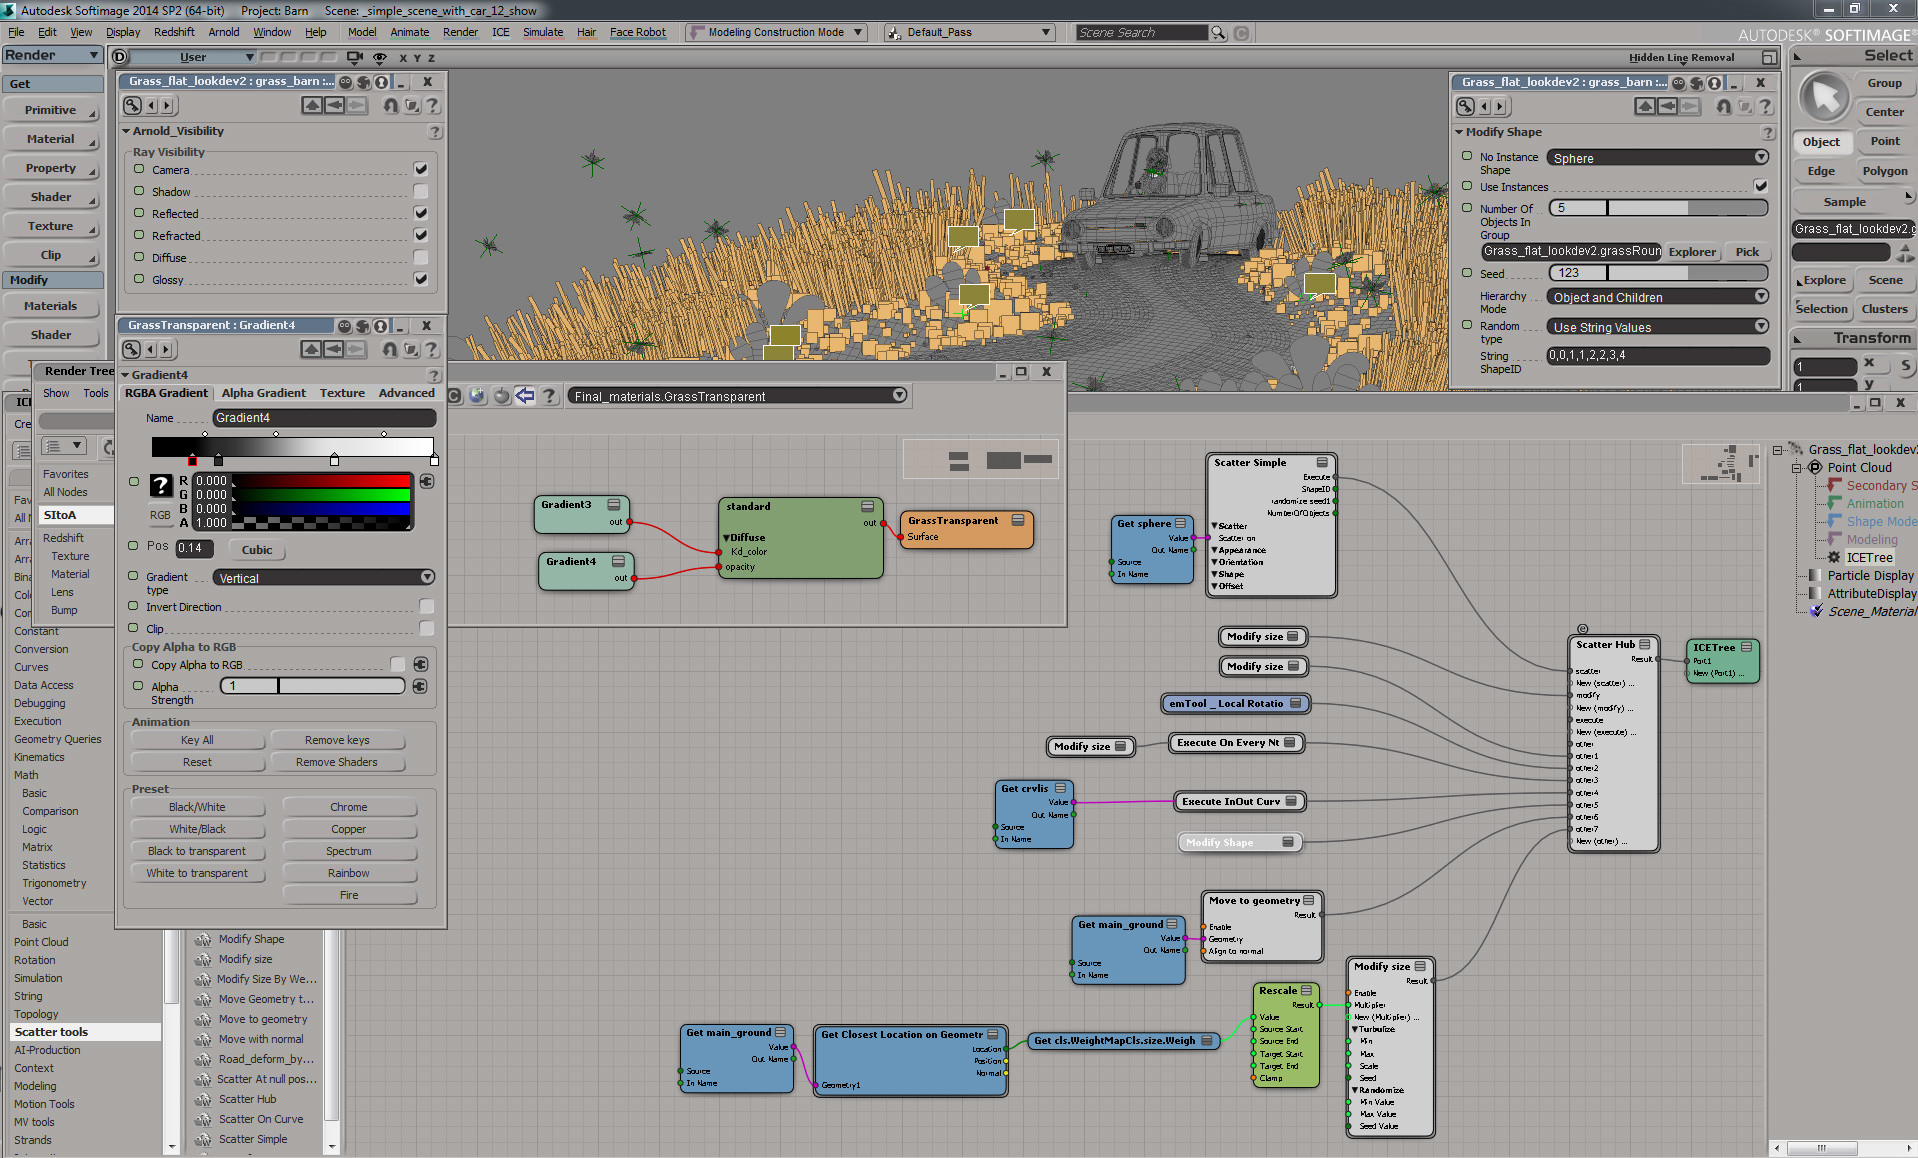
To place some specific objects in the scene, I use instances generated on Nulls. With several custom parameters created on each of those nulls, I can control shape and color of the instances generated with ICE and the color is later passed into material per instance (also size of the instance is based on scale of the null, orientation is the same as orientation of the null). Of course it would be really simple to place there those models directly and modify their materials by hand, but it's really great in more complex scenes, where those instances can have millions of polygons and more attributes etc... (also ICE can display those instances as points, boxes, spheres etc, making it much faster in the viewport)

Lighting
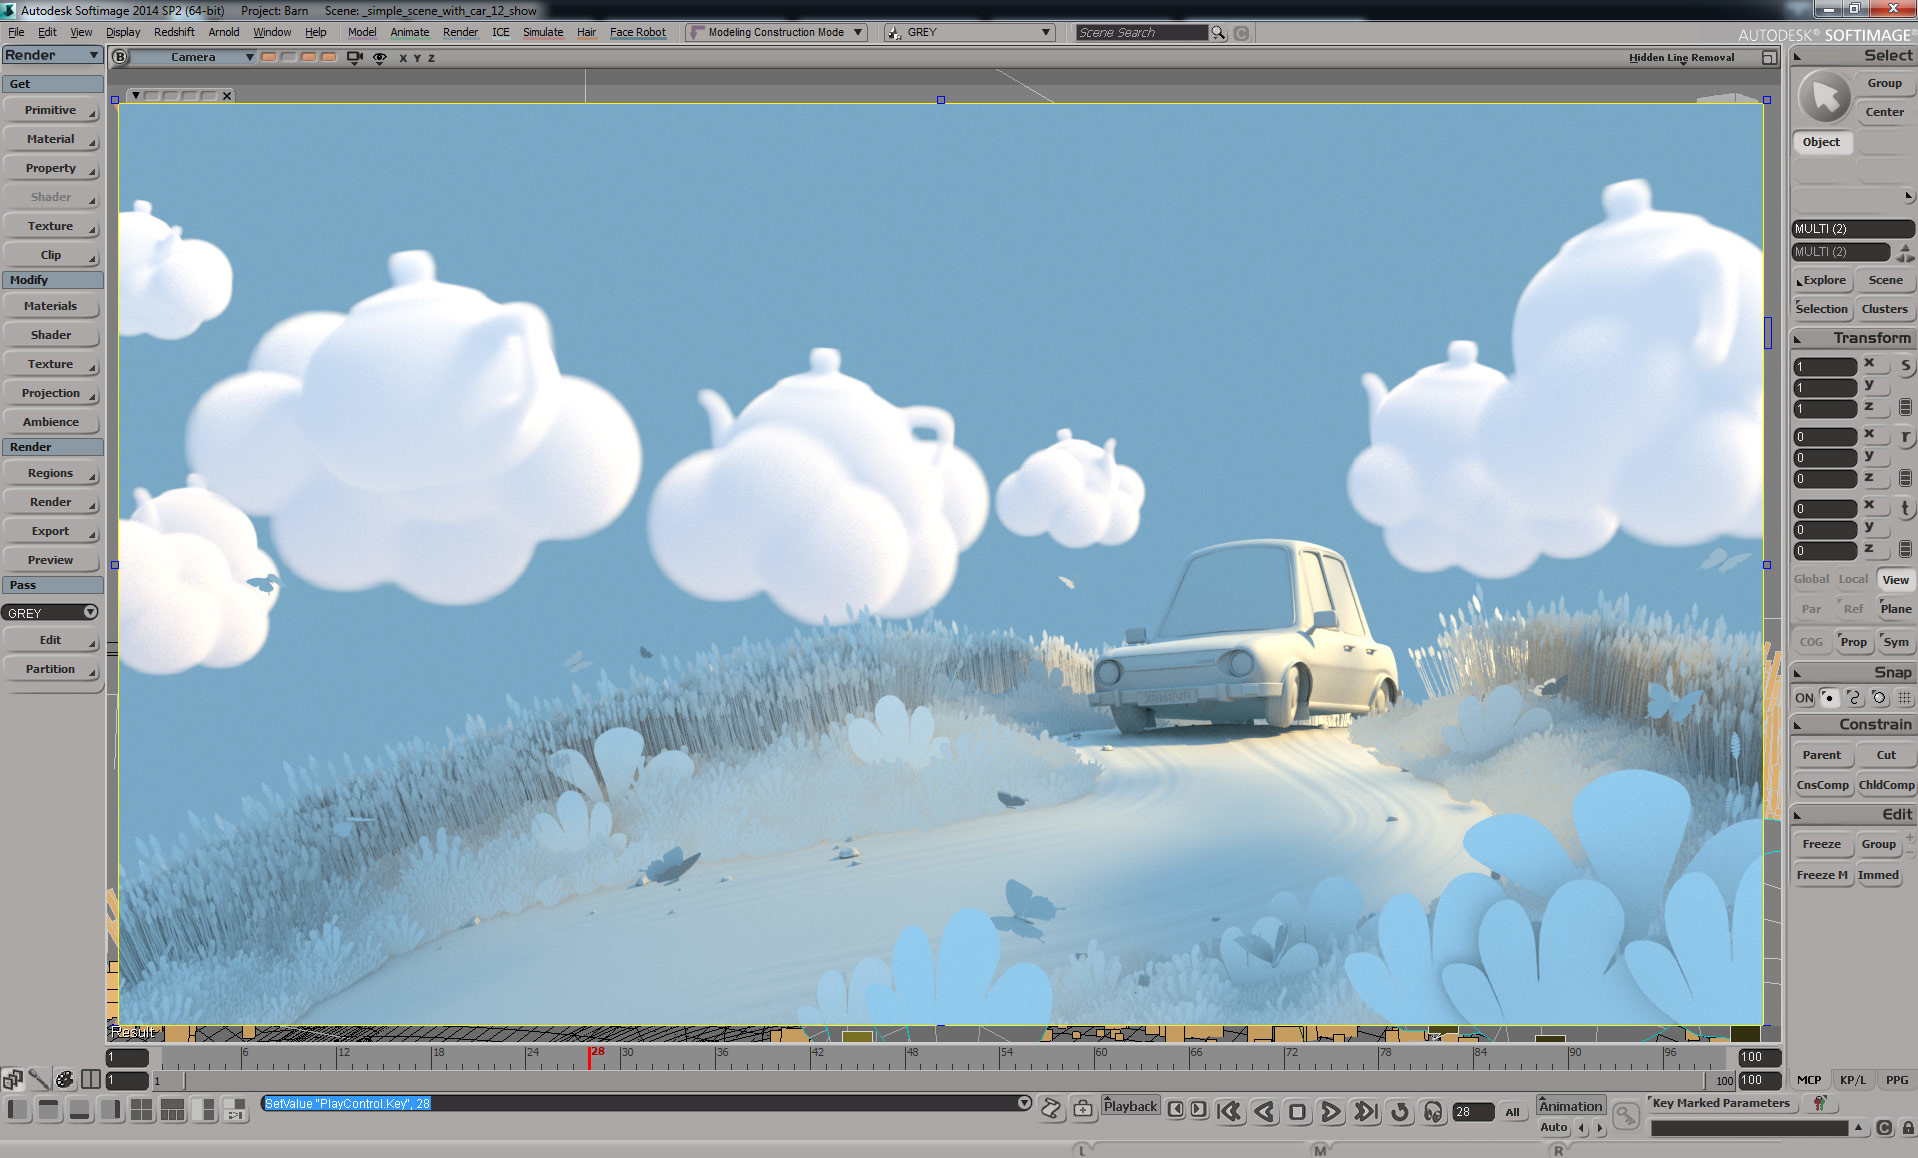
Well, there isn't really anything special about lighting. But my goal was to create a picture with a nice soft look, almost like painted. And to achieve that, I had to cheat a little bit.
Light setup is extremely simple. Sky and Sun. (and separate lights for clouds + extra fill for the character and bottom of the car). But instead of using some physical sky/sun system, I like to use ordinary spot light (area light) with a big radius (producing not realistic soft shadows) and a gobo filter to add some variety in the intensity of the sunlight and to focus attention more around the car.
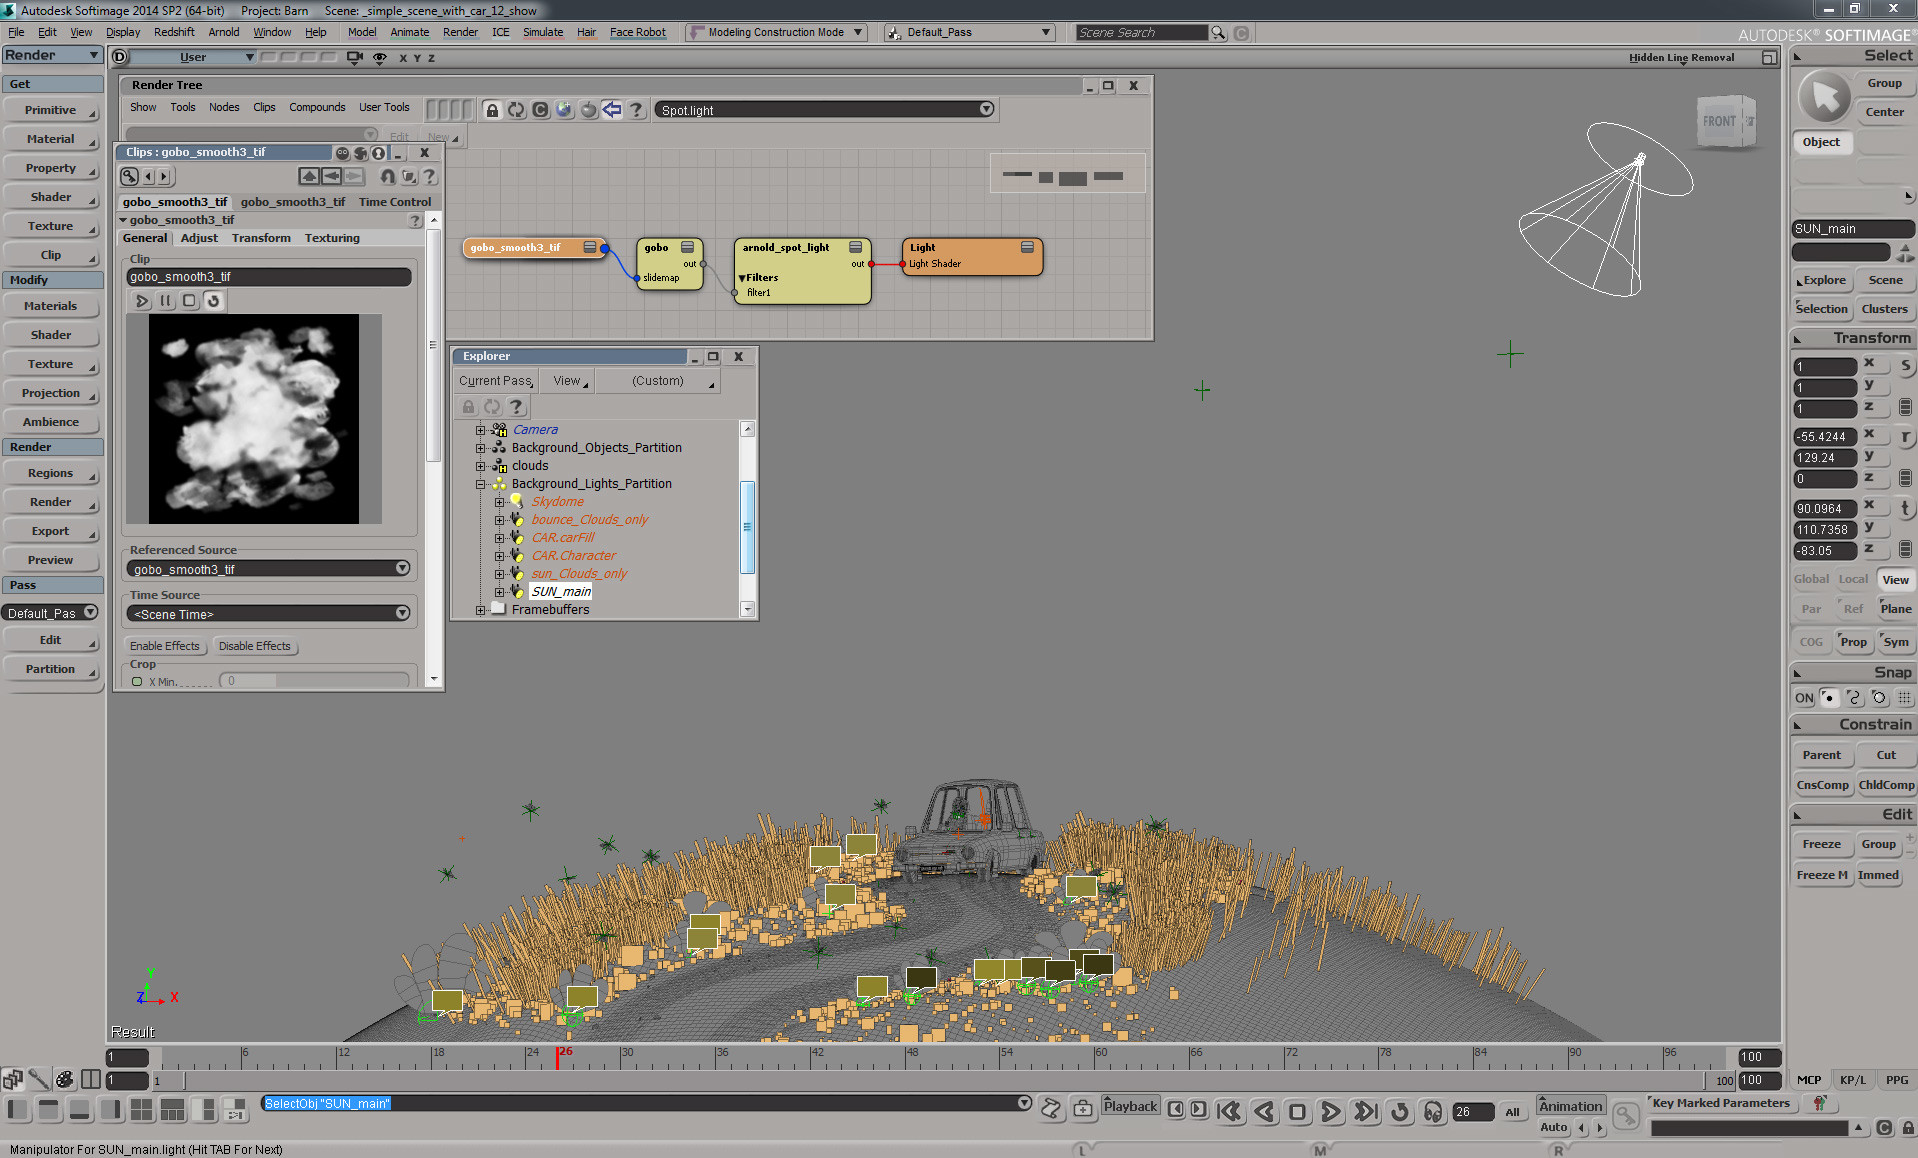
(those clouds have their own lights)
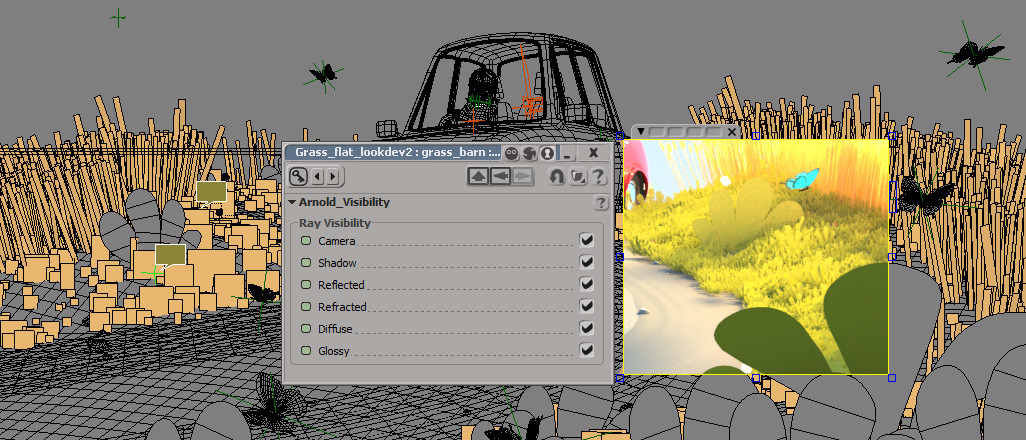
One of the main tricks to get desired look of the grass was to get rid of all the shadows. I found out that I don't really need small grass to cast shadows and it looks much nicer without them :)

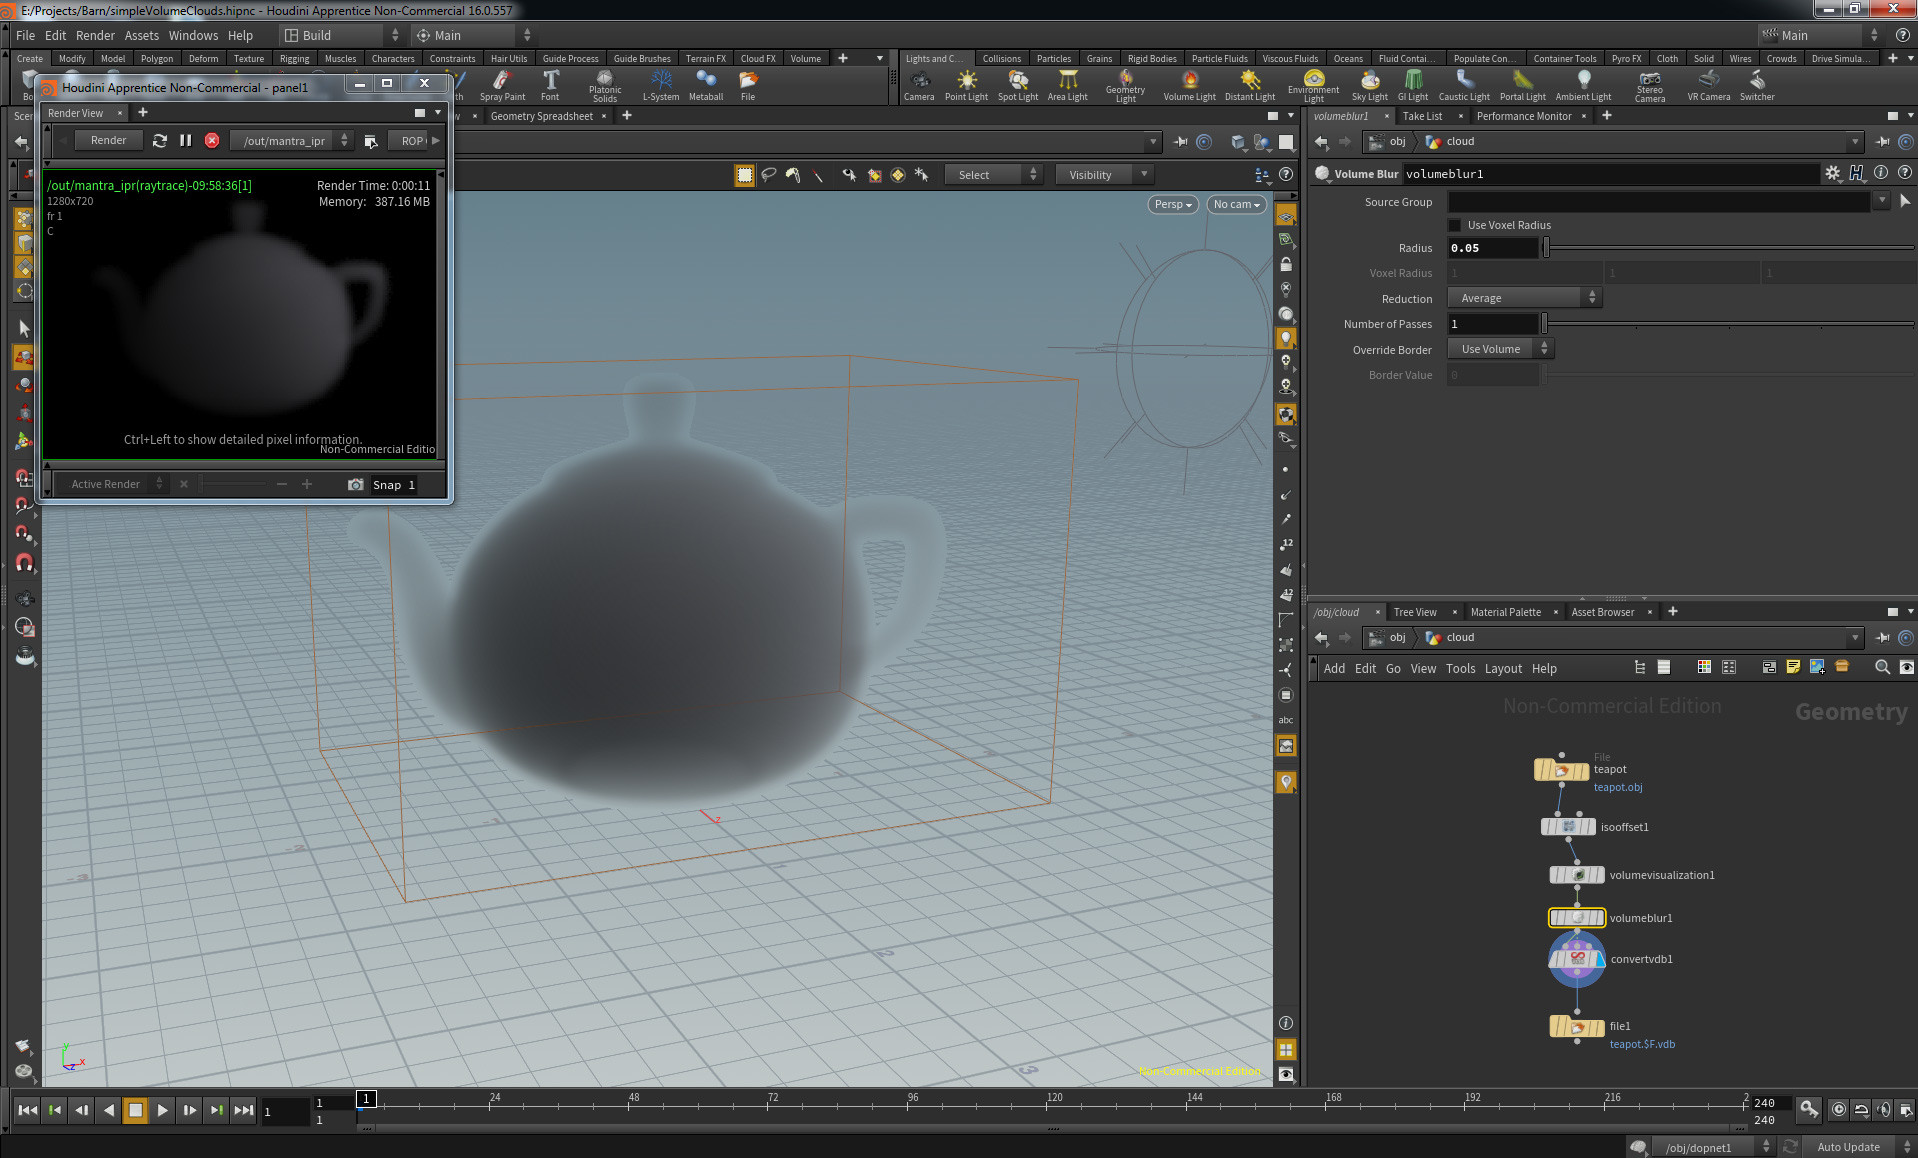
And one small step outside of Softimage. I used Houdini to convert a 3d mesh of a teapot into a volume. Blured it a little bit and exported as VDB. Then imported it back into Softimage and rendered it there with Arnold. And if you are wondering why teapots, well, simply because I really love tea and teapots :)
Compositing
Nothing too complex here either. I rendered clouds in separate layer and put it together in Nuke (non-commercial version is amazing, if HD resolution is good enough for you). There are several color corrections, glows and effects like DOF and vignette.

And that's pretty much it. I hope you enjoyed that :)